After-Birth Recovery Pads (Homemade)

So we are still pregnant today which gave me a little more time to prep (during my 2 year old's nap time)... I was waiting on a shipment of supplies which arrived a couple days ago!

IMG_8328.JPG

So, what kind of after-birth care can you prepare on your own? Well, for anyone who has given birth - you know that it doesn't always go smoothly and sometimes, you can tear you vaginal walls or can  most of the time, with a very sore and swollen pelvic region for weeks! Because you have a huge open wound, you are not supposed to take a true bath nor submerge in water/ocean/or liquids (shower ok but not a bathtub) until your bleeding has stopped (average woman is 4-8 weeks) due to any uncontrolled bacteria getting into your open pelvis and going all the way up into your uterus since you have an open cervix... (yikes!).  And so, the options are not very much - a siz bath (the hospital gives this mini booty-sit-in-bath that you use only a couple times and throw out) or you can use what many wives-tales talk of; Witch Hazel Pads. 

I did not use witch hazel pads or any real remedy to relieve my pelvis after my first 2 births, but now, I know better and have access to essential oils which really have been a blessing in coping with pregnant pains as well as all stress and health issues in general... Essential Oils mixed with the plant essence "Witch Hazel" is supposed to be one of the gentle and safe ways you can indeed soothe any rips, stretched out vaginal skin and vaginal-varicose veins (which is an untalked of symptom of pregnancy). Freeze your remedy soaked pads beforehand so they are ready for you when you come home form the hospital (or are ready cleared from your midwife at your home birth). 

You need:

  1. Cloth Pads (reusable menstrual kind or Hemp Pad inserts) or Clean Wash Cloths
  2. Witch Hazel Liquid (no other additives)
  3. Essential Oils
  4. Bowl to mix in (preferably not plastic as essential oils can bind with plastic and pull toxins into mixture)
  5. a mason jar or some kind of closable container that can freeze
  6. Freezer or Fridge
IMG_8330.JPG

Heres what I did:

I poured about 1/3 cup of Witch Hazel (I got mine online - message me for info) into a mason jar

+

Essential Oils that are proven to relieve the skin, surrounding veins, calm mind, and are safe for wounds and baby (in case you touch it while pregnant or it gets onto baby):

3 Drops of Doterra Lavendar

3 Drops of Doterra Geranium

3 Drops of Doterra Frankensince 

(To purchase, you can contact me for info and Wholesale Rates or buy direct at https://www.mydoterra.com/sarahnaomichristensen/#/)

Close Mason Jar, shake/swirl together to even out the oils.

Open the Pads or the Wash Cloths to lay out in a bowl.

IMG_8332.JPG

Pour the Mixture evenly over the inside of the pads (the part that will touch your perineum).

Let the pads soak a little in the mixture before rolling them up and fitting them into the Mason Jar to be stored. 

IMG_8333.JPG

*You may pour remaining mixture from bowl into the mason jar to further soak the pads, however, you do not want enough liquid to freeze the cloths shut where they will be difficult to open).

Close jar, freeze, and LABEL (so they don't get touched by others or contaminated).


IMG_8335.JPG


Homemade Baby Powder

So, if you didn't know (cause I didn't when I was a new mom), most baby powders that are store bought have talc in it or additives that cause irritation or long term health issues ... Which drove me to try more expensive baby powders from more natural based brands. I love Honest & BurtsBees powders, I also loved hearing my aunties day how they used to use cornstarch or root powders from regular cooking shelves! I wanted to try it and mixed in essential oils from recipes I found from other mommies:

IMG_8243.JPG


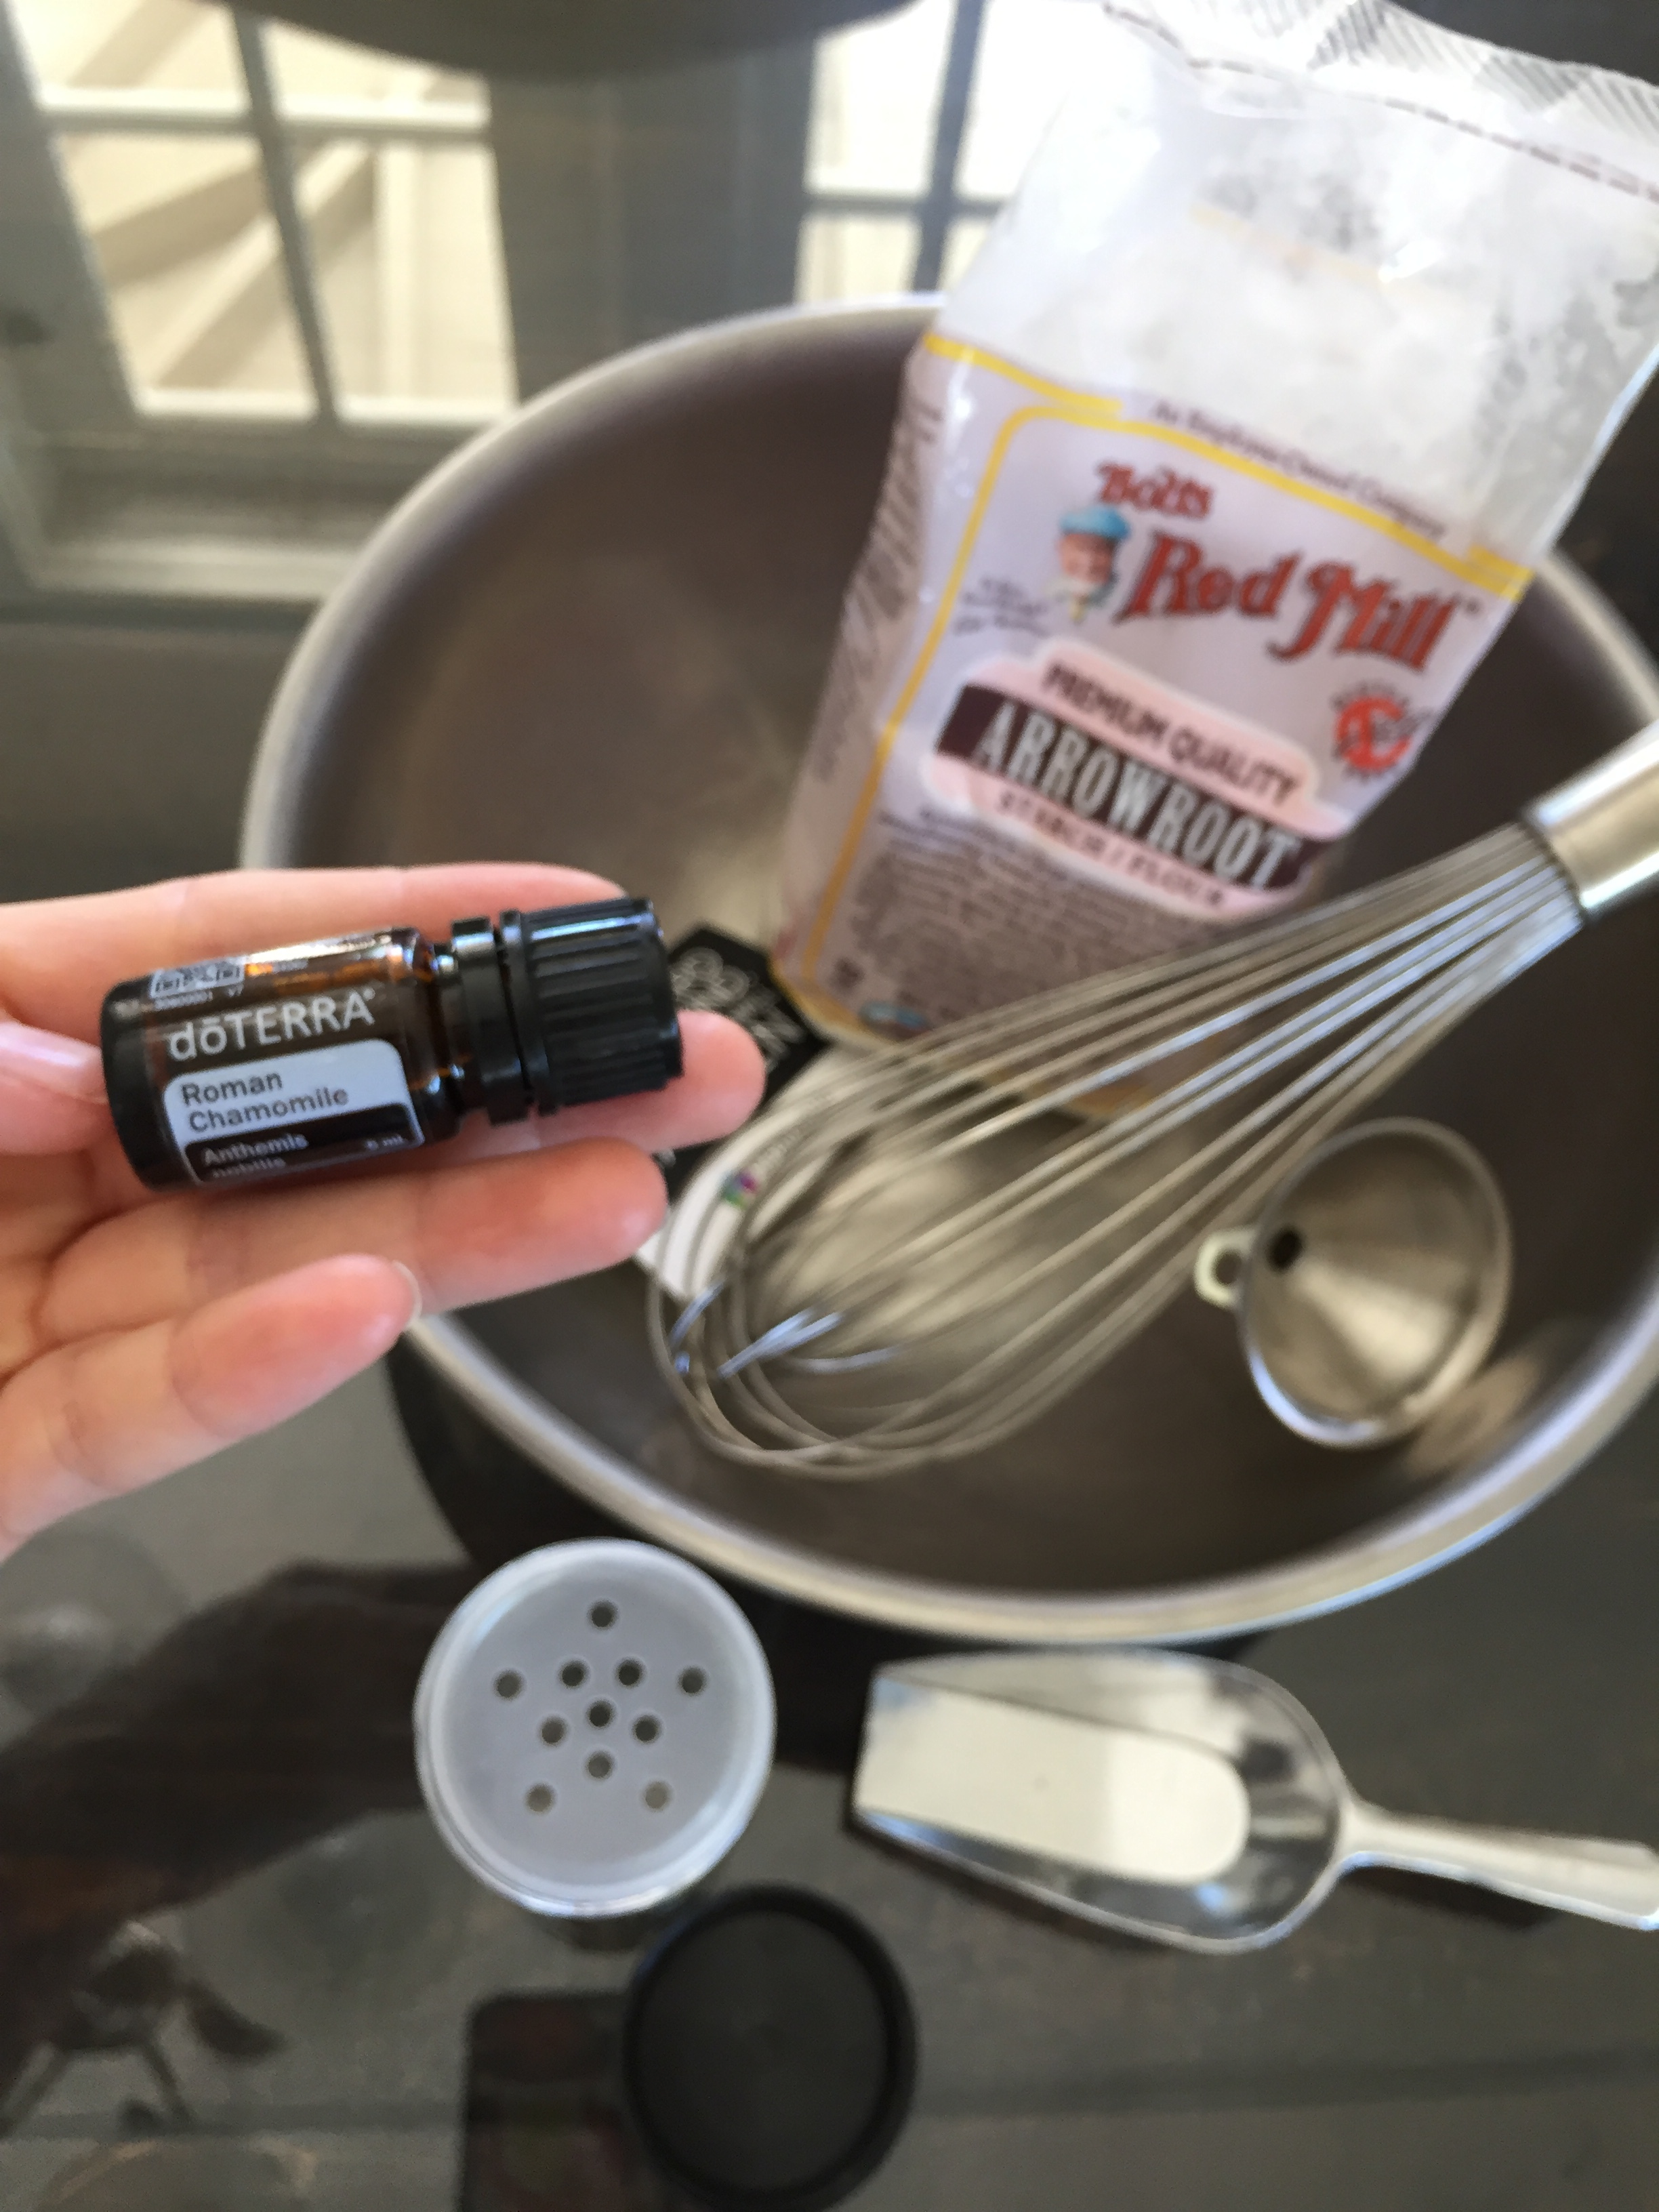
Arrowroot Starch: Similar to cornstarch (you can use cornstarch instead), it is a plant derived ground-up powder that is often used for thickening. It is also a gluten free choice and an egg substitute with a nice white color (why I like it over cornstarch). I bought the Bobs Red Mill brand from Wholefoods.

 +

Roman Chamomile Essential Oil: Essential oils are the extracted essence of a plant, this one is a flower. Chamomile is one of a few popular BabySafe* (not all are) oils that are also soothing to skin. Chamomile is known to ease emotions and calm and ease stress of both body and mind so it's a common choice for baby products. Other common baby product choices are Lavender, Orange, and Ylang-Ylang. I use the Doterra Brand and sell at both retail and wholesale if you want (click here to browse products online

IMG_8247.JPG

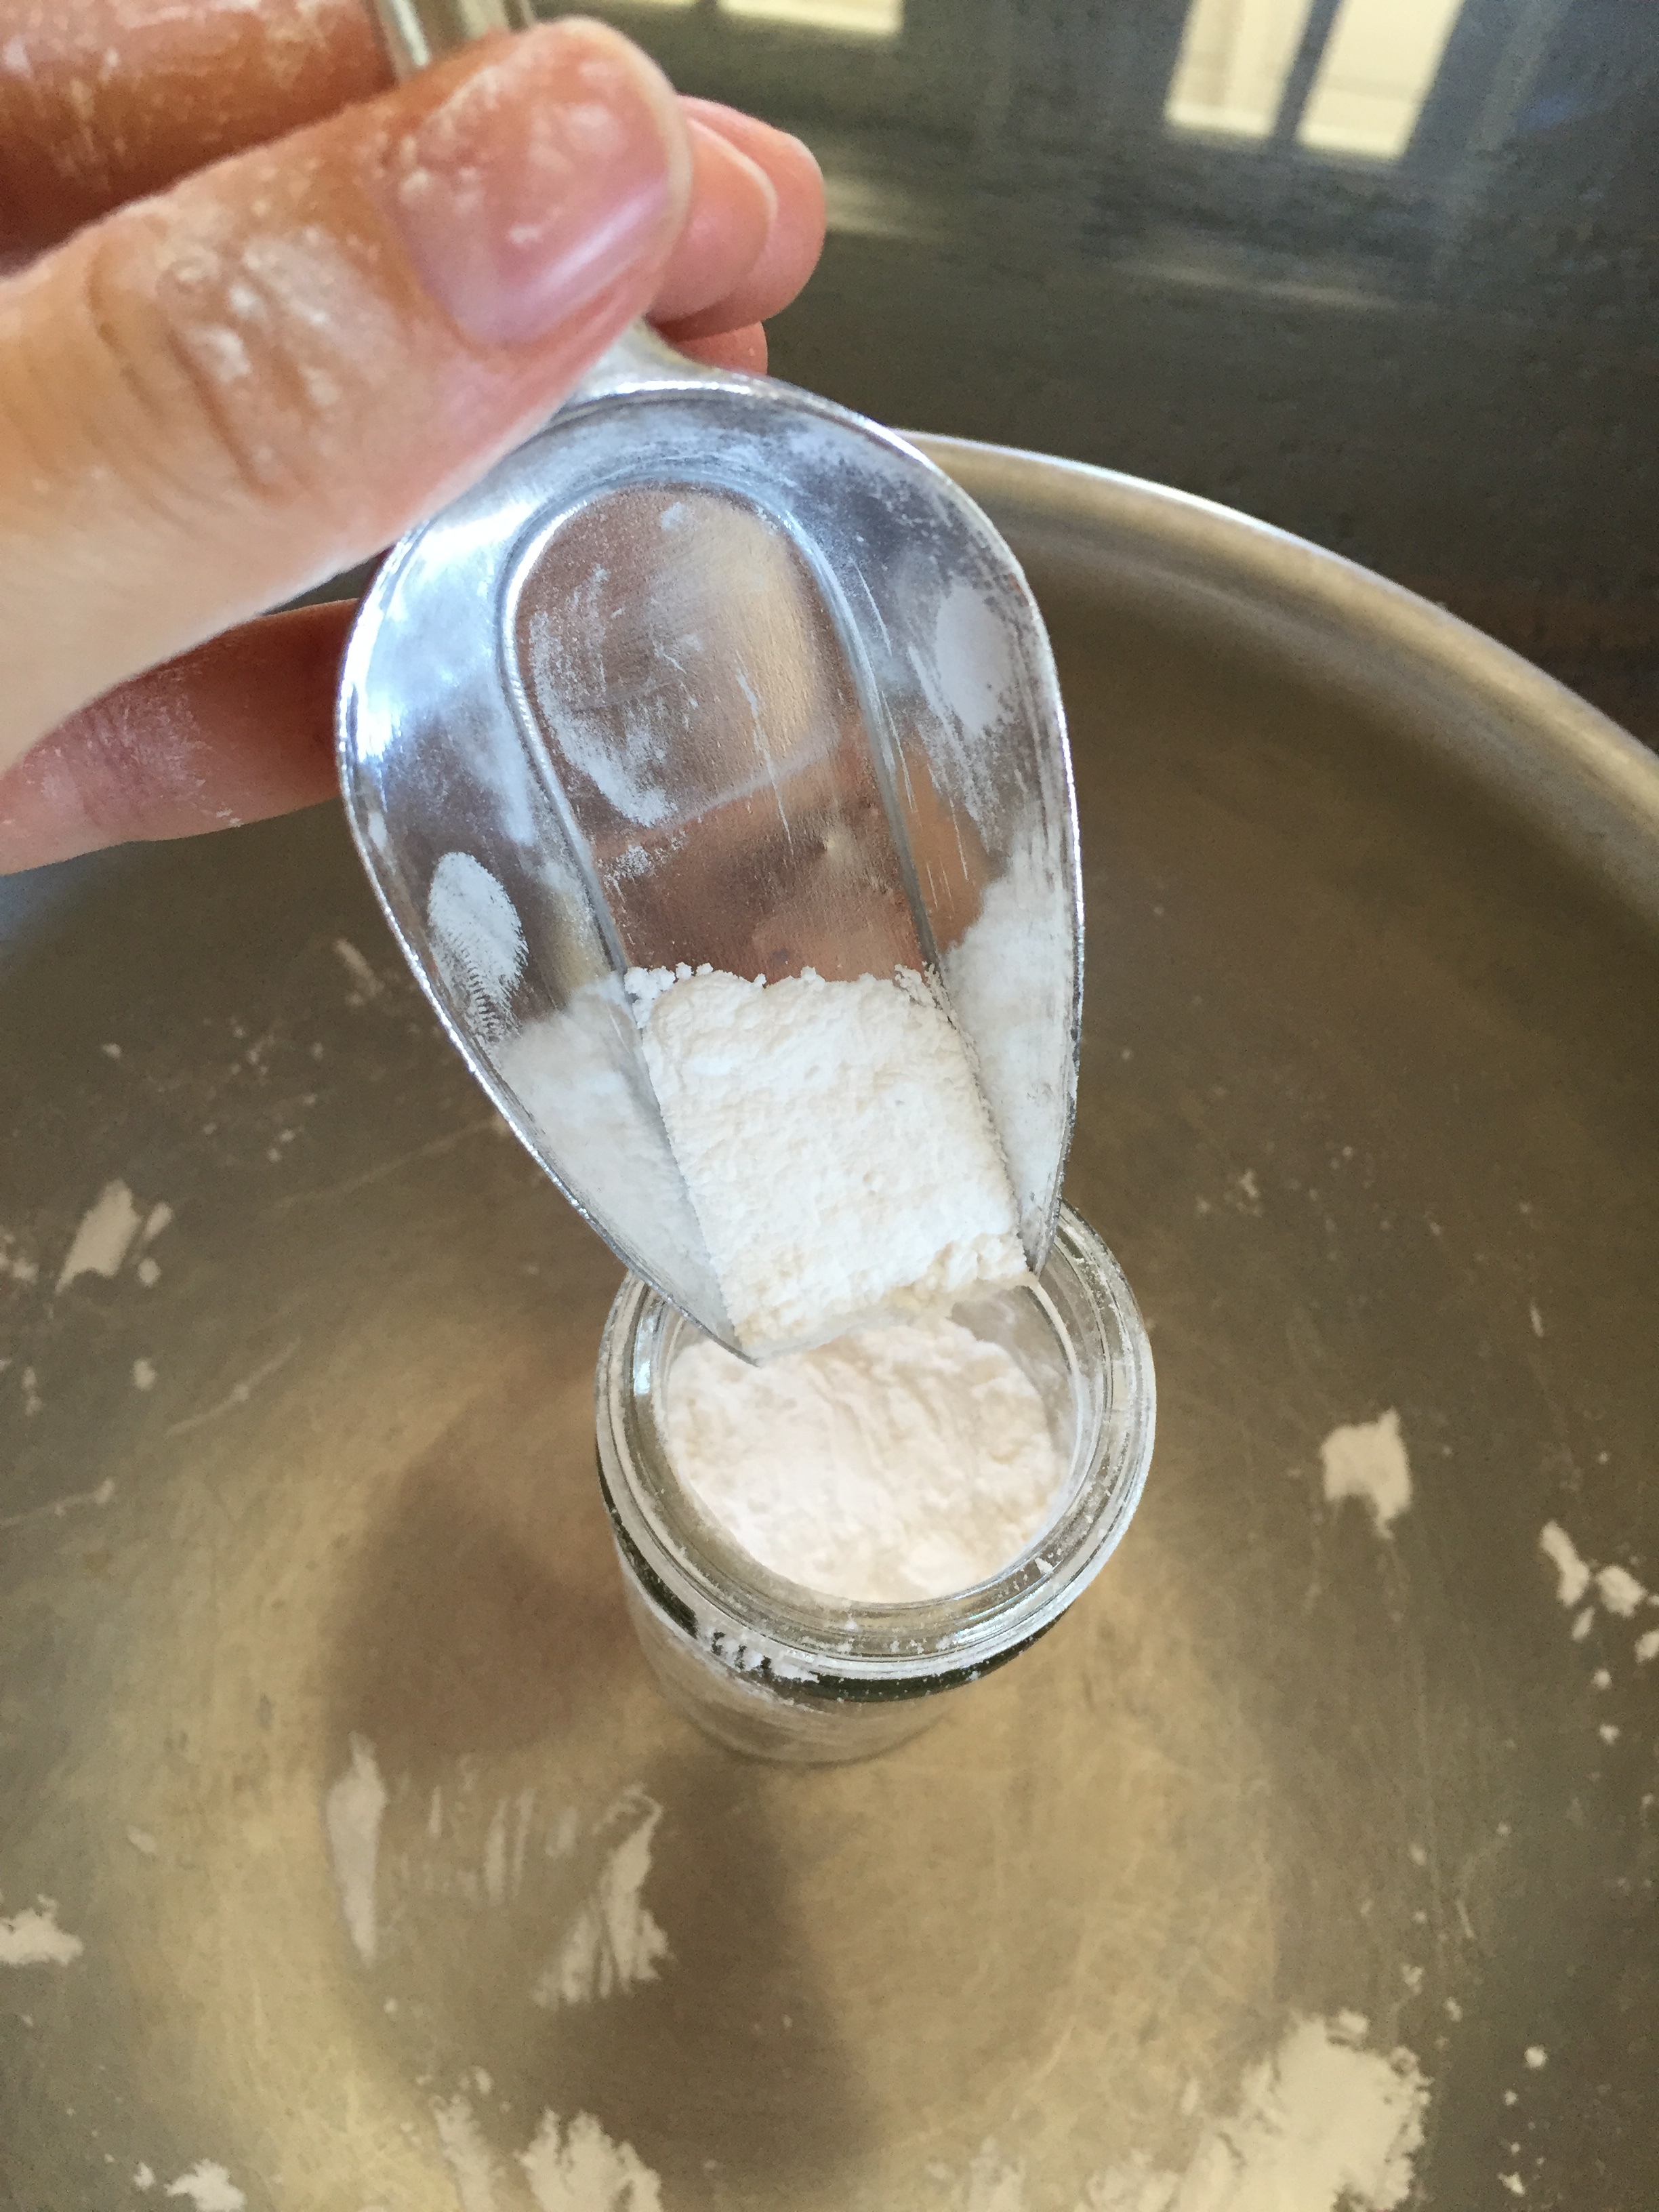
I simply scooped a few spoons of ground arrowroot and dropped in a few drops of essential oil (2-5 drops for a 3 ounce is fine) and mixed with a whisk until the drops had evenly settled throughout powder. I then scooped powder into a shaker and tightened cap. 

IMG_8248.JPG


It's a finer texture then cornstarch so a little more shaking is what it takes sometimes but it works great!  

Diapers

Diapers. This is usually the only thing non-parents know for sure goes hand in hand with babies. What most people don't know, is how many options of diapers there are, the amount of diapers you use and why things like cremes and powders are helpful. A lot of parents what to be very "green" now days and are therefore looking to cloth diapers as well, which is yes, ideal in saving trash, however, might not be the best scenario one you are actually the one changing those diapers. I've tried at least 10 different types of diapers, both disposable and cloth. Here is what you need to know about diapering: YOU ARE CHANGING DIAPERS CONSTANTLY - JUST LIKE BREASTFEEDING. Since YOU ARE BOUND TO TIME CONSUMPTION AND LACK OF SLEEP, CHOOSING THE DIAPERING SYSTEM THAT WILL MAKE YOUR LIFE EASIER IS PROBALLY THE BEST CHOICE. Trust me all of you who haven't had kids yet, it's harder once you are in it.

DIAPERS

Facts: Most parents change at least 10 dirty diapers a day the first month of a new baby's life. Many (like myself) changed even close to 20 diapers a day. Thats 300 - 600 diapers that first month. 

My first experience in diapering was with my little sister and brother. I am 6 and 10 years older than my siblings and I remember the mess of the cloth diapers we had at the time. The plain white cloth rectangles that you fold over their little butt and legs and pin with large pins that poked you if the baby moved. The good thing was, you bought one small sized cloth set of diapers for the early months and then a larger sized cloth set for the later months and a waterproof liner that was basically a slip over panty, which saved you money in not having to keep purchasing disposables. However, it means way more time dedicated to cleaning it and more laundry detergent, unless you have service that picks up, cleans for you, and delivers them back (which costs a monthly fee). When I became a mom myself, I was working 2/3 days a week and my husband was working everyday even weekends which meant I was alone in the cleaning - and that many diapers to clean in addition to breastfeeding, laundry, the extra sanitizing for the fragile infant, the non-sleep, the constant grocery shopping, cooking, frequent doctors visits and researching did not make cleaning roughly 20 soiled cloth diapers a day appealing for me. We had a smaller house at the time that didn't have a separate laundry room or even a real sink outside either, which meant I would have to soak the dodo in a bucket in the house and scrub it out using the kitchen sink or the bath in the one bathroom we had, meaning more cramped quarters with a very strong scent. So, we opted for the typical disposable brands Huggies and Pampers before trying other brands later.

My Experience with Huggies, Pampers, & Disposables:

The Biggest Help for New Parents = The Wetness Indicator 

The Biggest Help for New Parents = The Wetness Indicator 

  1. The "Wetness Indicator":  In the newborn stage, it is hard for the new parent to figure out why the baby keeps crying. Of course, it's normal for a newborn to cry often (like every hour, yes) but its frustrating to try feeding and still have him crying, to try to soothe, comfort, rock back to sleep and still have him crying, to change the music, give a bath, go on a car ride, and still have a baby crying, then to peak in the diaper and not "see" anything to have to change ... wondering, what is it??!!! Well, often it is the diaper. Even now, my son at 21 months is walking around in a wet diaper for awhile before we catch on. What really helps is the COLOR LINE on the diapers that Huggies and Pampers brands have. Its a light yellow line that turns a blue or green when wet which really helps to cut confusion of trying everything else. In the beginning especially, when new parents still learning how their baby works - the cycle, the cry that means eat vs. frustrated, what temperature they like, what sounds they like, etc. , parents often don't notice the tiny amounts of pee in the diaper that irritates their baby. I noticed my girl was more irritated with a soiled diaper than my boy. The color pee lines really helped to coach us into cuing in as parents the first time around. 

  2. Availability: These brands are sold everywhere. When you are exhausted (as moms you will be), and especially if you are busy running errands, juggling multiple children, working, you might forget to bring enough diapers with you. If you are needing more diapers, it saves a lot of time to know you can walk into any nearby grocery store, drug store, even major gas stations and pick up a pack of the smaller sized Huggies or Pampers. This is not the case with organic diapers or cloth diapers.
  3. Price : Huggies and Pampers are usually the brands that you can find deals on more regularly than other brands. Of course, Luvs and generic brands go on sale or can have better deals also. 
  4. Efficiency : The efficiency in holding the pee or poo from leaking has a lot to do with the thickness of the diaper, the shape, the contents its made with (for absorbing) and the staying power of not falling off. The shape is a little different between Huggies and Pampers. I liked the Pampers fit better for my daughter as she was more skinny and long vs the Huggies that is a little more wide and shorter, I felt. The velcro sides I really like as they seem to be pretty stuck on once placed. The only times we really had leaking problems with these brands were when it was time to move up in size or in the design style. From these brands, there is a "12-hour" version which holds quite a lot yet does not have the pee lines, however, but the time you need a heavier hold, I feel you are already more in tune with your baby and familiar with checking diapers that you won't need the pee lines anyway.
  5. Downside: The chemicals to absorb the soil are strong. I noticed my daughter's diaper rash became much much better when switching from these diapers to cloth and other disposable brands like Babyganics and Honest. While this might not be an issue for all babies, I noticed a big change in my daughter's sensitivity to these diapers once she started eating solid foods. As I researched and talked with other moms, it seems that solid foods caused a higher amount of acids in poo and that mixed with the chemicals in the diapers caused a bad irritation and even infections (girls parts need more frequent changing and very thorough yet gentle cleaning). Although I found certain ways of cleaning helped like using water for pee instead of wipes or using talc-free powder helped and certain diaper rash cremes in certain amounts helped, the biggest factor in my experiment of solving the diaper rash and infections were in switching out of these diapers themselves. So, by the time my second was eating solids (after I used all the gifted diapers from friends and family), I also switched him into a different kind of diaper. 

Disposable Diaper Brands I Tried:


Pampers with Wetness Indicator Size 1


Luvs Size 1


Huggies (More Absorbant Kind)


Parent's Choice All Sizes


Generic Brands that are not pictured but also efficient and affordable:

My Brief Experience with Cloth Diapers:

  1. Gentle on the skin: For my daughter's baby shower, we happen to have been gifted a set of cloth diapers. After the rash and infection episodes with my daughter, I tried just using cloth diapers for a few days to see if it made a difference and it did. Cloth diapers are just that - cloth. They are more bulky because it is only folds of material that is soaking up soiling, not chemicals or mesh materials. Seeing that the cloth diapers seemed to clear out her rash, I would use cloth diapers in-between the disposables when ever I felt she was more irritated in her private areas until we found the disposable diapers that really worked for us.
  2. Modern versions are easier to clean: Styles have changed since diapering my sister and brother in the early 90's. The modern day versions of cloth diapers are not merely thick long rectangle cloths that you fold into pins. Instead, you now have cute "diaper covers" that take the place of the pins basically snapping or velcro-ing a waterproofing liner over the cloth diapers keeping leakage to a minimal. The actual cloth that is now wrapped around the baby comes in much smaller sizes than before - as you now can use "inserts" that are shaped like a ten inch oval that fits into the diaper cover which minimizes the bulk. There are things a "cheesecloth" type of paper that can be lined in the cloth to help you roll up the poo and throw it out instead of poo being so soiled into the cloth like previously.  There are things like waterproof pail liners that can act like you laundry basket/trash bag for your dirty diapers that is similar to the disposable diaper pail. 
  3. Saves money: It does save some money to invest into reusable cloth diapers if you are able to handle the laundry loads yourself (vs. hiring an service to clean for you). This is true especially if you are using cloth diapers for multiple babies.
  4. Environmentally Friendly: Reusable diapers means less trash. However, it does mean much more laundry waste so do keep in mind the type of cleaning wastes this can create. Overall, minimizing trash combined with saving money is usually the reason people choose cloth diapers. 
  5. Downside: A lot of work to maintain. As I mentioned before, if you have a lot on your plate, as most moms do, plus work or another child, this is very time and energy consuming to maintain. I feel this also requires a  larger cleaning space (then just a tight apartment washer/dryer) to be able to sit the dirty diapers (until you can get to it hours later) without it soiling other cloths or stinking up the room, really soak the soiled - in a bucket or washing sink that is separate from what people take a bath in (unless you are going to keep cleaning the bath in-between all the daily poos soakings), and wash alone - not with other laundry (which means laundry sits longer accumulating piles). The other thing that is a pain with cloth is going out with the baby - you have to keep bags of dirty diapers used on that outing (in the grocery stores, Walmart, the park, the restaurant, the beach) and changing a bulkier load on the go can be messier. If you run out of diapers, not many places sell cloths except for a few Gerber prefolds at Walmart. You have to go to the boutique and specialty shops or order online for cloths - if you live here in Hawaii anyway.  

Cloth Diaper Brands I Tried:


Bambino Mio Newborn Set


Bum Genius One-Size-Fits-All


My Experience with Chemical-Free Disposables:

  1. Gentle on the skin: My kids have had almost no rash problems with these diapers. The only time I have seen rash or irritations were during very hot days (We are in Hawaii) or when being unable to change the diaper for a long period of time (like stuck in a bad traffic episode) 
  2. Convenient: There are more chemical free disposable versions now sold in major stores like Walmart, Target, and Longs. If you are at a mall, Nordstrom even sell Honest diapers. 
  3. Cute: Honest diapers are really really cute. I was liking the Babyganics diapers until I saw these - look how cute these are (see below).
  4. Downside: Generally, most chemical-free brands are a little more expensive (at least in Hawaii). Some of the brands that are equally priced to the mainstream brands are sometimes containing a smaller number of diapers in that pack or have less absorbency and therefore, you are having to use more, having to buy more. Partly why I initially switched to Honest diapers, is because of the bundling system which give s discounts on bulk purchasing that comes to be the same price as buying Huggies or Pampers. The absorbency of some of these chemical-free diapers was low, like Seventh Generation and Earth's Best, I have to admit - and that was frustrating as it caused more leaks and much more frequent diaper checking. 

My Favorite Diaper!

By The Honest Company Size 1


Click to Get a FREE trial of your favorite Honest bundle


Other Chemical-Free Disposables I tried:


Seventh Generation Senitive Size 1


BabyGanics Ultra Absorbant Size 2


365 Size 1

Earth's Best Newborn

Products for 0-3 months

So a lot of new moms have been asking me, "What do I really need for a baby? I mean, all these products just can't be necessary, right?" Well, actually, you need more than you realize but it's not all the fun stuff... The things you don't know you will need are the things for a mess you haven't experienced yet, to help you survive the weeks of 2hour-a-night-sleep, or the type or product that will work according to how your living habits are with your partner... Those are the reasons you might need those items. Even more so, babies' needs and capabilities change every so many weeks that what might work initially, won't work in the next month, and therefore, you will be drastically looking for a new item to fit that change once it comes - it might be easier to have it already on hand... In order to explain it as best I can to the new mom (or dad) who doesn't know, I made a list of the items I used with my babies. Each item soon will have an explanation as to WHY it was helpful, when it no longer was helpful, and where to find it in Hawaii (or by brand online). Hopefully, this helps to ease the overwhelming surprise of after-baby-is-born #IWishWeKnewThisBeforehand...

For Newborn Baby:

The Things They Used the Most

  • swaddle blankets
  • burp cloths
  • mittens
  • hats
  • socks

Clothes - The Basics

  • t-shirts (the button open kind, not pull over)
  • onesies
  • pajamas (that have full button openings for both legs instead of just one side)
  • crib shoes

Carriers, Carseats,  & Strollers

  • baby wraps
  • slings
  • Ergo & infant insert
  • infant carseat
  • carseat strap cushions
  • stroller (that works with the infant carseat) 
  • double stroller for two babies 
  • baby tent for beach

Diapering 

Bathing

  • baths
  • infant inserts
  • shampoo (special one for croup)
  • baby wash
  • wash cloths
  • towels (breathable)

Sleepers & Hangouts

  • Crib
  • Playpen
  • "Bobby" chair cushion
  • co-sleepers
  • Floor Mats
  • swings & bouncers

Hygiene 

  • nail clippers & files
  • hair brush
  • alcohol prep swab (belly button)
  • baby lotions & oils
  • gum cleaners

Medicines & Relievers

  • Motrin
  • teething pills
  • gum tethers
  • rash creme
  • supplements (in breastmilk or direct)

Toys

  • play mat
  • crib mobile
  • rattle
  • stuffed animal
  • carseat mobile
  • tummy time bolster

Feeding

  • bottles for feeding
  • nutrition supply for breastfeeders
  • bottle cooler bag (for daycare or outings)
  • formula options

For Mom:

Sentimentals

  • a baby record book
  • hand printing set or belly mask
  • higher phone storage
  • baby app
  • Baby Photoshoot

Breastfeeding 

House Cleaners 

  • house cleaners (safe)
  • toilet cleaners (safe)
  • dishwasher cleaners (safe)
  • laundry detergent (safe)
  • stain spray (safe)

Daily Help Items for Mom

  • diaper bag
  • water bottles (stock up)
  • waterproof laundry bag (soiled clothing)
  • separate diaper trash
  • car mirror
  • crockpot
  • robo vaccumn
  • pre-made smoothie
  • automatic coffee maker

Recovery Help for Afterbirth

  • bed liners
  • thick pads
  • prenatal vitamins
  • body oil
  • body butter
  • full big panties
  • breast pads
  • bras with strong support (Body by Victoria)
  • Yoga
  • massage
  • spray-bottle for water (in bathroom)

BreastFeeding, Pumps, Bottles, & Sippys

I've had so many new moms asking what bottles to use, or those planning on breastfeeding only, wondering why they would need any bottles at all...Because I breastfed, I looked at bottles as the way of being able to work (for even 2 hours you need to have milk available for the baby), go out on a date night, or as the supplement for days I might be sick and therefore, my body not able to supply milk like normal. If you plan to give formula at all, you need to find bottles that work for your baby as well - I never did have that experience of formula. Instead, our milk and feeding experiences went from:

  • sole breastfeeding, to
  • introducing the bottle filled with breastmilk (5/6 weeks), to
  • combining breastfeeding, breastmilk bottles and solid foods (1st at 5 months & 2nd at 7 months), to
  • introducing water in a sippy cup (bout 6-8 months) 
  • mixing in cows milk into the breastmilk bottle (at 1 year) and finally,
  • no breastmilk in bottles, only cows milk and solid food (1st at 14 months & 2nd at 17 months)

(Sometimes, moms switch milk feeding into the sippy cup instead of a bottle, however, my kids did not like the sippy cup for milk, preferring the sippy cups only for water and juice. It seemed confusing to them and therefore, frustrating, if we switched containers for milk vs. water/juice.)

Here's what we used, how we used, and why we did what we did...

1. The Breastpump:

In America, every mom qualifies for a FREE ELECTRIC BREASTPUMP from their insurance due to the law (see https://www.healthcare.gov/coverage/breast-feeding-benefits/ for more info). When I was inquiring of this during my first pregnancy, it was the hospital I delivered at, Kapiolani Medical, that gave me the information and form to fill out during my birth recovery stay there (those first 2 days out of birth are filled with new information). Thankfully, my insurance, gave us 4 Medela brand options. Medea brand is very good, I was told by clinic staff, and the double electric was recommended to me because of the ability to pump both breasts at the same time, in the fastest time, being electric as opposed to by hand. I took the professionals recommendations:

Pump in Style Advanced BreastPump Starter Kit

Pump in Style Advanced BreastPump Starter Kit

This pump was soo easy to work with once you figure it out. The only difficult part may be trying to get both boobs pumping at the same time, which takes some coordination and practice. I often would only pump one breast at a time because I would leave the other breast for the baby as their feedings were frequent. 

When to start Pumping?

In the first couple weeks of afterbirth. I know that sounds early (not to mention overwhelming with all the other stresses going on in the beginning of post partem), however, being able to keep up a strong enough milk supply to continue breastfeeding is half the battle, and the pump can really help in stimulating frequent milk supply. You see, the body is a learning machine, at first your breast are enormous and ready to give as much as needed to whatever hungry appetite there could be, however, the milk supply decreases as it realizes you are not using all the milk. So the more frequently you are milking, the more you body is replenishing. As you lessen the milking, so does your body. A lot of being able to keep the milk supply strong also has to do constantly resupplying your body's WATER and NUTRITION that the milking depletes.

So initially, I was pumping once a day starting about ten days after birth (once i had gotten a little bit of a routine for my child and could anticipate a time to schedule in a pump session) In the beginning, it took anywhere from 20 to 45 minutes to pump. I usually produced about 6 ounces each breast for every milking session until about six months. Every woman is different so you might not have as much and that is totally fine. When you pump, you have to be able to relax for the milk to "let down" and release out into a flow...thats what is different from the direct breastfeeding of a baby; the baby's suckle stimulates let down, while the pump's artificial tug can be less comfortable or harder to start sometimes. If the Pump is hurting you, it could be that you have the suction turned up too high, or the funnel cup is too small to contain the entire nipple and surrounding areola in the suction (as this is the way correct, non-painful breastfeeding should be, with the baby's mouth completely encompassing the entire nipple and areola). I had to start with the larger cup (as after birth i was a triple ddd cup breast) and gradually moved down to the medium size as my breast size (and weight) lessened. 

Best reference for BreastFeeding I received as a gift from a friend, written by a mother with medical experience. 

image.jpg

2. The Storage Bags & Containers

So the particular pump mentioned (all meddle brand pumps), connects into containers that can be either capped with a nipple insert as a bottle, or capped for storage in the fridge. With my daughter, we used these bottles as storage as she liked a different, slim and slanted, bottle to drink out of. With my son, we used these bottles as the bottle he fed from as he preferred this type nipple over the ones that attached to the bottle my daughter preferred. 

You do not have to use these containers - I actually preferred to use storage bags because, a bag took up less space, had material to write notes on (will explain) and was cheap and disposable (while you you would have to clean each container for reuse). So how do you put the milk into the bag? Either, you carefully pour out the milk captured in the container into the bag, squeeze out the air and seal, or if its the same brand as the pump, like the Medela brand bags, you can attached the bag directly to the pump so the milk drains into the bag leaving you needing only to detach and seal. 

In Hawaii, you can buy these at Longs, Walmart, Target, Baby Awareness, and BabiesRUs...

In Hawaii, you can buy these at Longs, Walmart, Target, Baby Awareness, and BabiesRUs...

This is what I meant by the bag can attached directly to the pump, making things easier. In Hawaii, you can buy these at Walmart, BabiesRUs, Baby Emporium,  and Target...

This is what I meant by the bag can attached directly to the pump, making things easier. In Hawaii, you can buy these at Walmart, BabiesRUs, Baby Emporium,  and Target...

Why would you want to write on the bag?

First, you want to write on it the date of milk expressed because, you can only store breastmilk up to 5 days in the fridge or as MayoClinic.org states:

 Consider these general guidelines for healthy infants:

  • Room temperature. Freshly expressed breast milk can be kept at room temperature for up to six hours. However, use or proper storage within four hours is optimal. If the room is especially warm, the limit is also four hours.
  • Insulated cooler. Freshly expressed breast milk can be stored in an insulated cooler with ice packs for up to one day.
  • Refrigerator. Freshly expressed breast milk can be stored in the back of the refrigerator for up to five days in clean conditions. However, use or freezer storage within three days is optimal.
  • Deep freezer. Freshly expressed breast milk can be stored in the back of a deep freezer for up to 12 months. However, using the frozen milk within six months is optimal.

And once a frozen milk package is dethawed, use within 24hours.

Second, you want to write the amount of milk in ounces, so you can keep track of how much your child is eating at each feeding. If your child is suddenly eating less then normal, it could be he is sick or doesn't like the taste of the milk, which means he is reacting to something you ate or your stress level. If your child is increasing in amount eating, you can prepare yourself for a growth spurt or long nights teething pain, etc.  

Third, you want to write the on the bag or bottle, the name of child in cases where you have other people feeding your child. Even if its someone coming to your home where there is no other child to confuse the ownership of the breastmilk with, many people are not familiar with breastmilk and could easily be confused on which bag is what. Maybe you need to take your child to a daycare at one point, they will have many babies with breastmilk packages stored in the fridge.

3. The Bottles

We tried a few different bottles. Some, my kids liked, some they didn't. How their mouths suckle and how the mom's nipple is shaped determines the type of "nipple" they will like. The age of the baby and their ability to suck and cosumption rate determines the "flow" of the nipple type. You will see on the nipple label, "0 - 3 months" or "newborn", "4 - 12months", etc. The type of bottle shape should be easy for your child to hold - my kids did better with the shorter bottles until they could hold the bottle well on their own (4/5months mine could). My daughter liked the Playtex slanted bottles because of its "Vent-air" system which eliminated the amount of gas caused by sucking. 


She spit up a lot, so eliminating the gas and irritation as much as possible was really important; that bottle seemed to be the one she had the least spit ups and could easily hold. My son only liked to drink milk in an almost-lying-down position so he liked the regular, non-slant bottles that were easy to hold in this angle. He was also very emotional and much more attached to me than my first; the bottle he preferred had nipples that really resembled my own. My daughter drank a lot more at one time, so using the longer bottles which could hold more milk, made sense. My son was eating smaller amounts but constantly, so having many smaller sized bottles made more sense for him. 


4. The Cleaning of the Bottles & Pump Parts 

There is so much work that goes into using pump and bottles! You have to keep all the pieces clean and sterile for the sensitive infant can easily because sick from mildew or bacteria. Not only can the milk become contaminated, but your breasts can become infected and clog-up, swell, causing headaches, fevers, and pain! 

First off, do not get the electric pump wet - it will break. If a little milk splatters on there just wipe it off it use one of the cleaning wipes (examples below) do not ever soak with water. 

Second, once you've pumped, you must rinse out or wash out with soap, the funnel and its corresponding parts. However, The tubes will almost never completely dry out if water gets inside.  I used a special sterilization bag that microwaves your tubes and parts that was so easy! 


The thing about soaps* to be careful of, many dishsoaps contain really harsh chemicals that are potential harmful to your baby. So knowing that, I would soak my used parts and bottles (with nipples, etc) in this Medela breastmilk remover soap (below) mixed with warm water in a plastic bin until I had more time to deal with it (like at the end of the day, after accumulated bottles from daycare or the sitter). Other great soaps for baby items I used were The Honest Company's dishwashing liquid and Dawn brand as it has less chemicals then other mainstream detergents.

When I was traveling or at work, I'd often have to pump in the unfamiliar bathroom of wherever I was, and be able to clean up afterwards. The Medela Quick Cleaning Wipes really convinient as they were not damp like wipes, which needs drying, but more like a soap suds swipe that easily evaporated. 

Third, when ready to scrub your parts, the hardest part For me, was getting into the small areas of the tiny Nipple, conjoining piece of the pump, or the small holes in the sippy cup (next to come). Most places sell a baby bottle brush, but not all places sell these: 

This bottle brush comes with the small twist out nipple brush (as shown coming out of the handle)  is from Munchkin. I bought this at Baby Emporium, however it is sometimes stocked at Walmart. I'm sure it's sold many other places as this brand …

This bottle brush comes with the small twist out nipple brush (as shown coming out of the handle)  is from Munchkin. I bought this at Baby Emporium, however it is sometimes stocked at Walmart. I'm sure it's sold many other places as this brand is very well known and affordable.

These were the biggest help in getting inbetween the inside of the niplle-cover etchings, as well as the sippy cup. 

These were the biggest help in getting inbetween the inside of the niplle-cover etchings, as well as the sippy cup. 

The best set of brushes I found, that gets into every nook of those bottle lids, sippy cups, and nipple ends. I bought this at Nordstrom. 

The best set of brushes I found, that gets into every nook of those bottle lids, sippy cups, and nipple ends. I bought this at Nordstrom. 

Lastly, to dry out the bottles and parts, you need a breathable drying holder that can contain your small fragile parts, and allow the bottles to drip dry upside down. The problem with small bottle pieces like nipples, caps, screw tops, is that they easily get misplaced, not dried out well due to limited positioning, or easily dirtied again when  drying with the regular dishes in the regular dish rack. That's why I recommend using a bottle "tree" that allows bottle to hang upside down in an angle that allows all moister to drop out properly, and small accompanying parts to fit on a raised platform of the "tree" base. This product really worked for me:

The Sprout Dring Rack from Munchkin sold at  Walmart and Target of Hawaii... 

The Sprout Dring Rack from Munchkin sold at  Walmart and Target of Hawaii... 

Click for more info: Munchkin Sprout Drying Rack

I also really loved the "grass" bottle drying rack from Boon Inc as it grips your small pieces like nipples, straws, suction stoppers and handles, meaning less lost pieces. It also comes in two sizes - I prefer the skinner version as it fits easily in small spaces of the counter, window sill or sink.

Boon Grass Dring Rack sold at Baby Emporium, Baby Awareness, and Nordstrom in Hawaii... 

Boon Grass Dring Rack sold at Baby Emporium, Baby Awareness, and Nordstrom in Hawaii... 

Click for more info: Boon PATCH Countertop Drying Rack

The brush cleaners I explained of earlier were especially helpful for the small holes of the sippy cup spouts, which is otherwise almost impossible to clean out.


6. The Sippy Cup

 In the early months, we used the cups with a rubber or flexible spout that was like a snobby nipple - an easier tradition from the nipple for the sucking motion. After 6 months is when any sippy cup seems to work fine. It then just became a matter of shape preference for how well it fit in her/his hands, the lunchbox, the cup holder of the car seat, etc.

A big factor I noticed with my second child, was leak ability. My son constantly tosses aside whatever food, toy, clothing no longer interests him, including the bottles. I learned that some sippys withstand better than others. 

This is one of the more durabale, non-leak sippy cups I found (above), by Munchkin. Click for more info: Munchkin Mighty Grip Spill-Proof Cups - 10 oz - 2 ct

The only real cup type I avoid is the built in straw types, as they are difficult to clean if, like me, you don't always have the time to clean them right after use. Even with the brushes I mentioned, the drying process takes awhile as you cannot towel out the skinny of the straw. So if you cannot get the right ventilation, bacteria can form. I love straw types that have a thicker straw that detached easy. 

These by SkipHop straw cups are soooo cute and easy to attatch to bag with a Velcro side...they also give you an extra straw insert for later (like when the sitter doesn't figure out the cup after it's been taken apart for cleaning😉). You can buy a…

These by SkipHop straw cups are soooo cute and easy to attatch to bag with a Velcro side...they also give you an extra straw insert for later (like when the sitter doesn't figure out the cup after it's been taken apart for cleaning😉). You can buy at Baby Emporium and Nordstrom.

This one by First Years is the easiest to clean and the kids had an easier time with this thicker straw then the thin straw at first. (Bought at Safeway.)

This one by First Years is the easiest to clean and the kids had an easier time with this thicker straw then the thin straw at first. (Bought at Safeway.)